
Some of you may be asking, What is Thermal Imaging? (which if that’s the case and you landed here, THANKS!). Thermal Imaging is the process of using specialized tools that see radiant/thermal energy instead of visible light. Basically, they are cameras the give these colored pictures but the color pixels we see reflect the surface temperature of the item being photographed.
So how does this relate to use by Home Inspectors? Well, it comes up handy in quite a few ways. Bear in mind that the InterNACHI SOP (see tab above to review) does not require, promote or allow for destructive testing. This technology, in some cases, gives us a kind of x-ray vision. Inspectors use thermal imaging to primarily look for water. Water is the number one enemy of our buildings, in locations or materials in which aren’t designed or intended to be exposed to water. Water is by far the largest destroyer of homes, often coming in unseen and wreaking havoc. We “see” elevated moisture in thermal imaging due to evaporative cooling phenomenon. Evaporative cooling is like when we sweat from being too hot, the sweat evaporates off our bodies and cools us down. Similar occurs when water is exposed to building materials, and we use the meters to see that evaporative cooling effect on the building materials. So, lets look at a few case study examples to see how this tool may become highly useful:
CASE STUDY #1
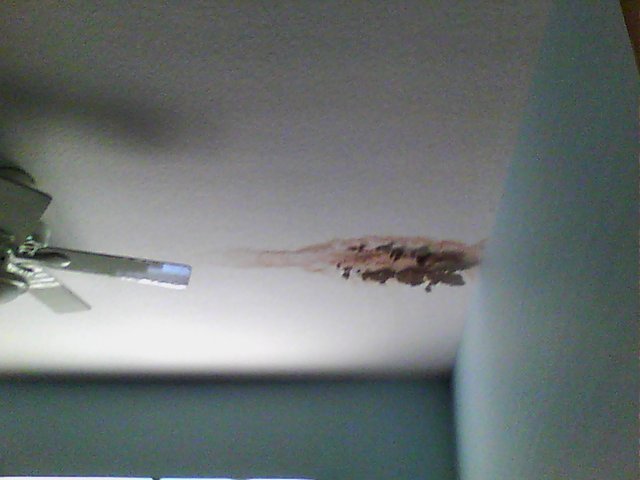
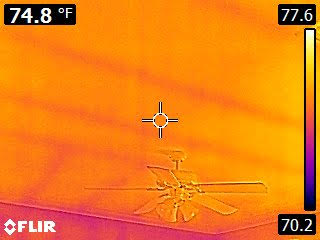
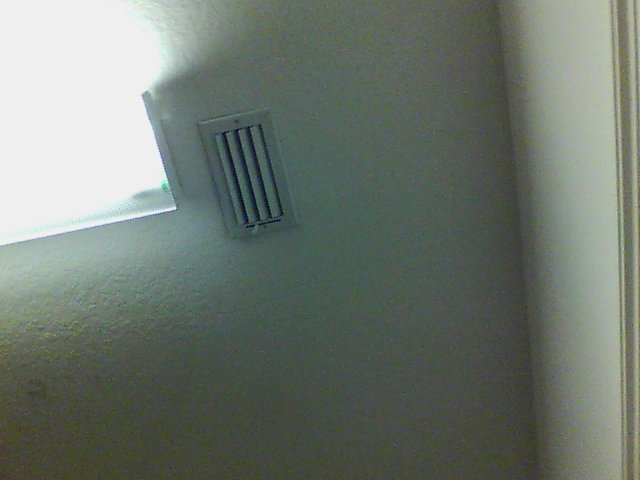
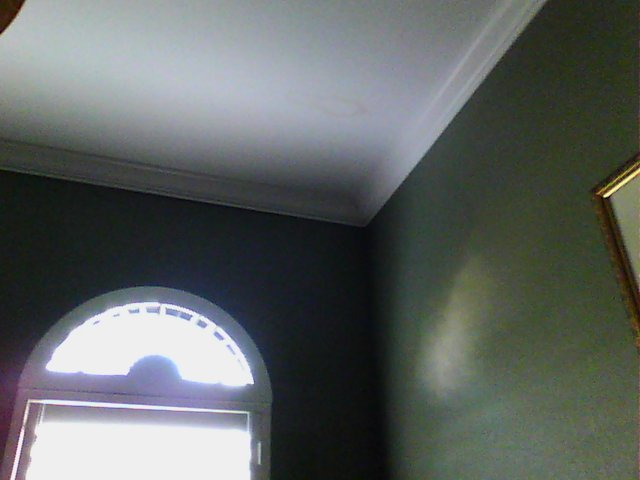
For example, here you can see a pretty common/typical living space. You have a nice bedroom, a tray ceiling, and a ceiling fan:
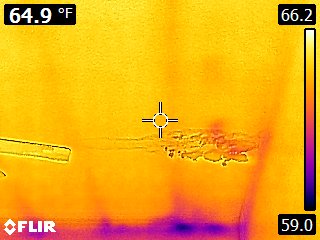
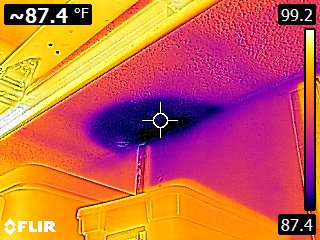
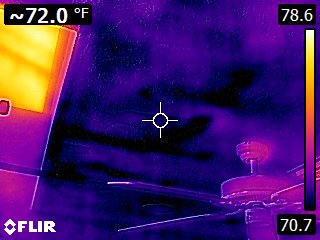
Everything looks great, no stains or signs of any visible issues. When we look at the thermal imaging, we see the image below. The general ceiling area is around 70 degrees Fahrenheit, while the purple areas are in the mid 50’s:
You can see the thermal anomaly starting at the base of the ceiling fan. This one thankfully is not a deal killer, and is actually very common. The temperature differential here was the result of a missing section of insulation. A section of missing insulation isn’t a catastrophic defect, but one worth noting. More impactful, though, when we went into the attic we saw darkened stains some wood framing and the attic side of the drywall as well as some roof decking “repairs” at a vent stack.
I say “repairs” because applying sealant to the interior face of a leak only blocks the symptom of the water intrusion, the leakage or staining into the drywall, and does not stop the source. This will cause the roof decking to be exposed to elevated amounts of water until the damage is significant enough to cause loss of wood strength, if the roof/envelope above is not addressed. Due to the cosmetic repairs inside and the sealant application in the attic, this condition may not have been noticeable at all if it weren’t for thermal imaging. It is likely that the homeowner had someone come in and remove the wet insulation when they did the sub-par roof repair.
CASE STUDY #2
I have a generally dirty looking section of wall in the landing area for the garage. I actually saw similar looking staining along another wall where the dog ran back/forth rubbing its back into the wall.
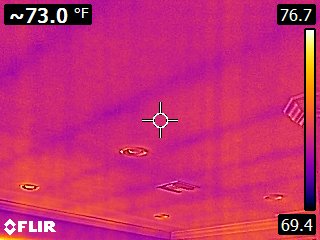
This one looked a little different, and I saw some wood rot/swelling, so I broke out the thermal imager. I quickly saw a very noticeable temperature difference of the materials near the base. In the picture below, the orangish color is pretty consistent in all of the building materials, whereas the lower 12 inches or so was strikingly more wet:
This picture also kind of gives you the idea. You can see in the visible image that there is not a ton of outward staining, but the thermal image (lower left of the image below) has a striking amount of temperature differential. It’s tough to see, but that wall below the triple light switch is fully saturated to a height nearly 24 inches above the slab.
The side wall of the refrigerator surround (plywood) has NO visible staining. It was very wet, as confirmed by using thermal imaging and verified with moisture meters:
When the refrigerator was pulled out, the damage was very visible and very obvious. There was an active icemaker leak:
So this is not a scenario I can exclaim that was “saved” by thermal imaging, but it shows you how surface observation alone may not always tell you the full story.
CASE STUDY #3
In this one I was inspecting a very well kept single family home. When inspecting the kitchen sink area, I initially thought the arcing darkened area (very faint) was the shadow from the pluming line onto the back of the sink (follows the same contour).
When using thermal imaging, however, it became very obvious there may have been an on-going issue here. Tough to see, but you can see the plumbing line that is bright blue extending up from the number 78 in the image. That right hand quadrant was saturated:
As it turns out, there was a very slow but active leak at the dishwasher supply hose. Not so obvious to the naked eye, but glaringly obvious to the thermal imager.
CASE STUDY #4
For New Construction For New Construction jobs, I have used thermal imaging, along with a ferrous (steel) detector to map out vertically filled pilasters (structural columns) for already constructed CMU walls. The conditions have to be just right, and periods/times of highest temperature differential help this type of imagery become highly visible:
We do not always get the luxury of being on-site for the pouring, and the bond-beam makes it impossible to “see” the cells filled. This technology helps verify completion, even when inspecting after the fact. Again, this part shows us that the cells were filled, whereas a ferrous detector can be used (or other tools) to verify the presence of steel reinforcement.
CASE STUDY #5
This next one looks terrible. You can clearly see that there has been some leakage occurring. Thermal imaging quickly told me that the area was dry at the time of our inspection, indicating that the leak above was likely fixed (here in Florida, it rains nearly every day. When you have leaks, you tend to see them pretty regularly).
So you can see, there is a time and a place for all levels of technology. Will the thermal imager save the day for an inadequately qualified inspector? Probably not. Will it make the inspector’s life easier? Probably. Can it catch something that may have otherwise not been caught by conventional means? Yes, that absolutely can happen. So like anything else, the tool is only as good and useful as the user. This particular tool, in the hands of a trained inspector who knows how to use it (its limitations and capabilities), is a powerful tool that Red Flat Home Inspectors would not be without. So expect use of a thermal imager on all of our inspections. We see that most in the industry charge for use of a thermal imager, but frankly we don’t want to run the risk of clients not selecting that option. So expect thermal imaging to be done, and for it to be included in your inspection fee without additional charge. To us, this technology has the potential to be the hero, and even when it proves unimpactful, only solidifies that our inspectors have done their jobs to the fullest. Therefore, to us thermal imagers are NOT hype.
Here are some additional photographs:


5 thoughts on “Thermal Imaging: Inspector’s Hero or Hype?”
What thermal imager did you use for these? Thank you fit for the blog, was very helpful
It is actually two different models, a Fluke Tir32 and a Flir One. Thanks for stopping by!
I added some photos using the new SeekSHOT Pro Thermal imager. It’s the square camera in the new 2nd case study (old one was blurry). It has the same thermal resolution as the Fluke Tir32 (320×240) but a few thousand less $$$. I highly recommend this one, which you can see HERE.
You said that the roof trusses being seen as the blue-ish color is normal. How do you know that isn’t water? If not water, why would the thermal camera show it as different?
Great question Alice!
Yes, the different colored lines are quite normal. In the summer they look blue with orangish colors elsewhere, and the two reverse in the winter months. What you are seeing is the wood (material) blocking more of the radiant energy (heat) from passing than the insulation. Water induced thermal anomalies are much more distinct (visually in the imager), as you see in some of the examples and ends up being very irregular in shape. If any of this is ever in question, I would use a meter to check it I’m seeing a temperature anomaly or a surface cooling from water exposure. Let me know if this is unclear